Add a Placement
Overview
You can insert a content or product recommendation placement on a page using Experience Designer. When Experience Designer is enabled for a site, you will see the Edit Page option in the experience browser menu. This option enables you to insert placements on the page for both content and product recommendations. With content placements you will also be able to create campaigns. With recommendation placements you can edit layout options of the placement. When the placement and campaign are published, the placement is dynamically added to the page when a customer loads the page.
How it works?
Adding a placement to a page currently works with p13n.js (client-side) implementations. When adding the placement through Experience Designer on a page, the anchor and layout information is saved. When the page is loaded, the anchor and layout information are used to add the placement at the desired position.
Note: Changing the page can impact the anchor information for the placement. It is important to validate the placement within Experience Designer if the page is changed.
You can see the dependency on the page within p13n_generated. The following are included for dynamic placements:
-
Placement Name
-
Template Used
-
Anchoring Data
-
Position: Identifies the selection when inserting, where values can be afterend or afterbegin
-
Selectors: An array of 2 CSS path selectors which select the already existing element
-
Inserting the Placement on the Page
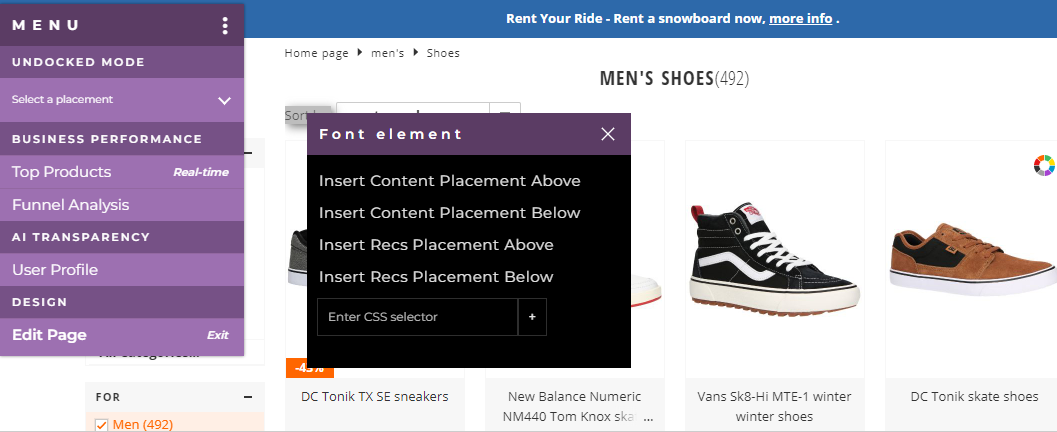
When clicking to edit the page, you can select a section of the page. By moving your mouse around the page, you will see sections of the page highlighted with the html for that section specified. You can click the mouse to see the menu and select the option to insert a content placement above or below the selected section of the page.

Note: You can move the menu around using your mouse to reposition it on the page.
After inserting a placement, you will see that the status of the placement is in the bottom right and it will say "unsaved" until you name the placement and save it from the placement menu.
The toolbar for the placement has the placement menu and some design options. The placement menu is specific to the type of placement, content, or product recommendations.

The design options include cut-and-paste, resize, and position.

The cut-and-paste option enables you to move the placement to another position on the page. When you click on the scissors you will enter the mode to select a section on the page where you can then paste the placement above or below that section.
The resize option enables you to resize the placement by moving the edges.
The position option enables you to move the placement around on the page in different ways.
-
You can reorder the placement by moving the placement around the page with your mouse. The placement is inserted where you drop it.
-
You can drag the placement into position, which this feature is used to align the placement with other content on the page. The horizontal and vertical lines display when you click to drag the placement into position to better align the placement with the existing content.
-
You can enter the margins for the placement in pixels to fine tune the position of the placement.
Once the content placement is saved, you will see the "saved" status at the bottom right of the placement.
For a content placement you can list the campaigns for the placement or create a new campaign. You can then publish the placement.
For a recommendation placement you can then edit the layout to control how the product recommendations will display.